If friends were flowers I’d pick you!

Hi everyone!

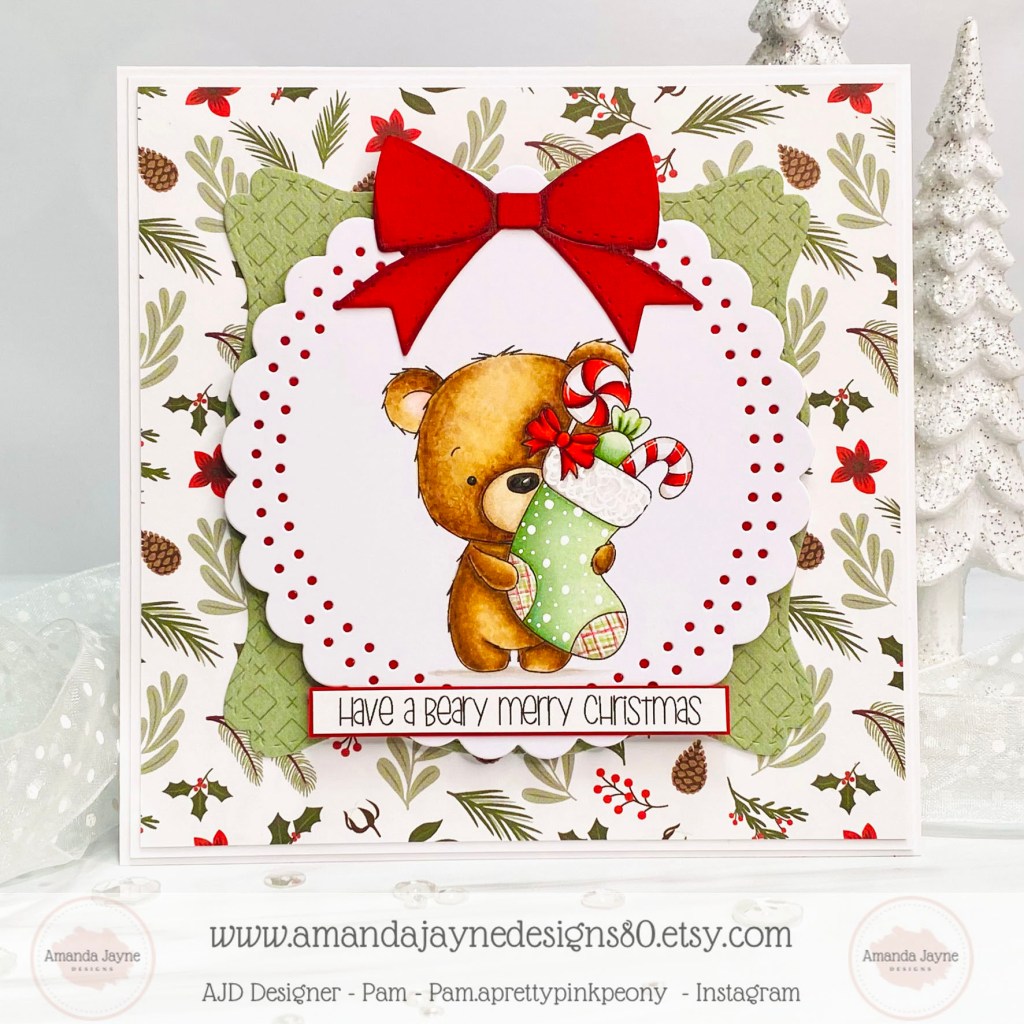
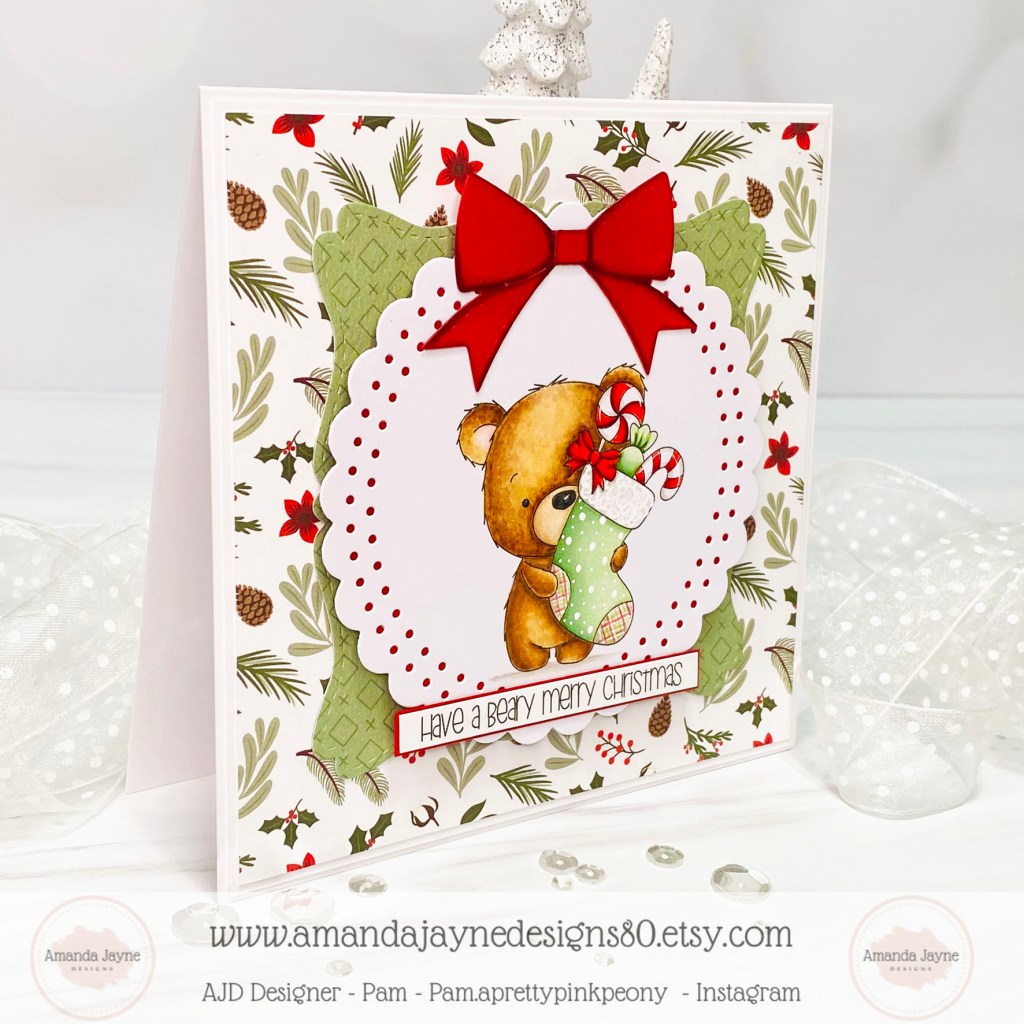
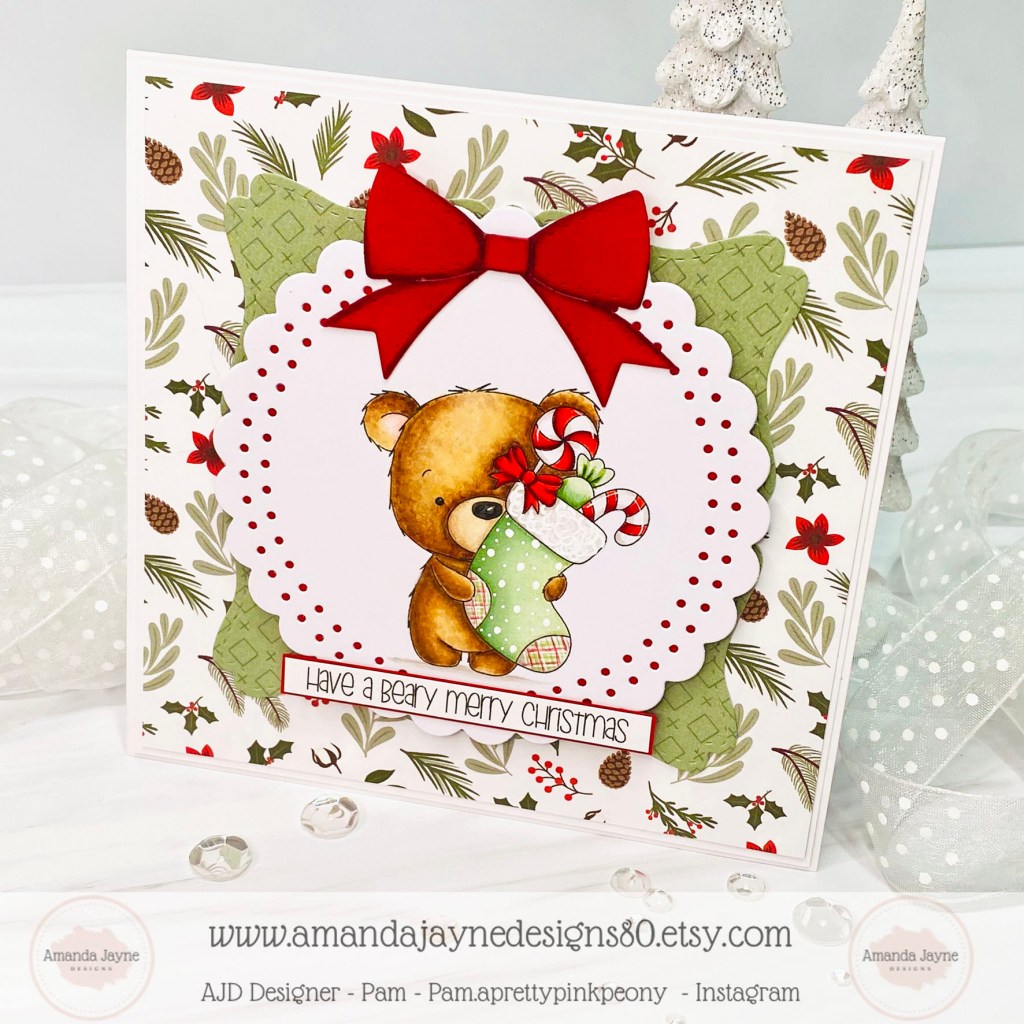
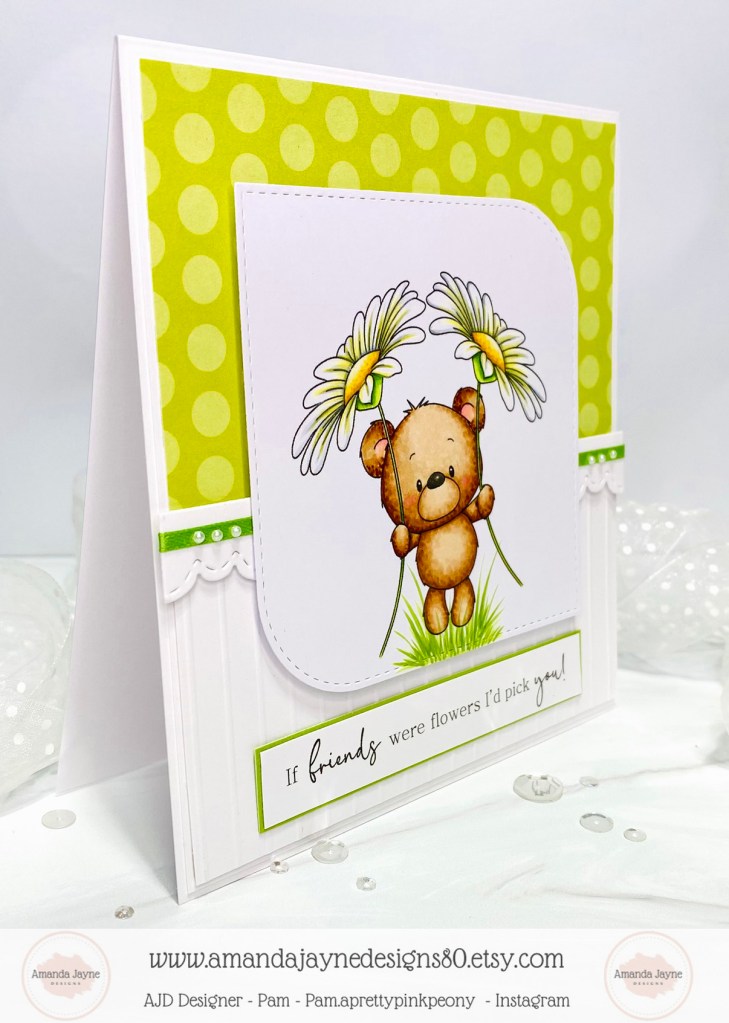
Oh my goodness, I’m so in love with this adorable little bear from Amanda Jayne Designs! Such a sweet and versatile image for all occassions.

This sweet image is called ‘Daisy Bear’ and can be found here.


This little cutie was printed on X-Press It Blending Card and was colored with the following markers:

~Copics~
Bear: E37, E35, E34, E33, E31, E30, R43, R20, R30, R00, W7, W6
Green: YG67, YG17, YG03, G20
Flowers: C2, YR23, Y15, Y11, Y00

The bottom panel was created with a notebook embossing folder which I turned sideways so the lines were vertical. To cover up the top of this panel I added a die cut scalloped border die that I had attached ribbon to. Once my card was put together I placed a few sticky back pearls on each side of the image.


As always you can find lots of adorable inspiration images here.

Thanks for visiting today!

Crafty Hugs ~ Pam xx

You can also follow me on Instagram or my facebook page!

Have a beary merry christmas

Hi crafty friends!

Oh my word, how adorable is this little bear from Amanda Jayne Designs? His little stocking is almost as big as he is!

This sweet digital image can be found here.


I printed the little cutie on X-Press It Blending Card and colored him with the following markers:

~Copics~
Brown: E57, E35, E34, E31, E30, R20, R00
Green: YG67, YG63, YG61
Red: R89, R46, R27, R24
Gray: W4, W2, W1, W0, W00
Nose: Black
White Gel Pen


It’s been way too many years since I’ve hung stockings at my house, but how fun would it be to see if Santa would fill one for me with crafty goodies instead of candy…lol!

As always you can find lots of adorable inspiration images here.

Thanks for visiting today!

Crafty Hugs ~ Pam xx

You can also follow me on Instagram or my facebook page!

Wishing you all the joys of the season

Hello friends!

I’m so excited to announce that I’ve joined the design team of Amanda Jayne Designs!!

My first project was created with this super adorable digital stamp called Candy Cane Lane. This digital stamp also comes with a cute little boy holding a candy cane.


I printed this sweet girl on X-Press It Blending Card and colored her with the following markers.

~Copics~
Skin: E04, E11, E21, E00, E000, E0000, R20, R30, R00
Hair: E59, E57, E55, E53
Grays: W4, W3, W2, W1, W0, W00
Red: R59, R37, R35, R22
Green: YG67, YG99
White Gel Pen
Details added with colored pencils


I started by digging through my Christmas paper and found this candy cane paper that matched her so perfectly. I had recently purchased a new die from Papertrey Ink called ‘Love to Layer: Pinked Edge Squares’ that I love and wanted to use, but as it’s square it wasn’t going to work without making some modifications. To create a rectangle I partially die cut it from both ends re-adjusting the die to stretch it. From there I added a few layers and two colors of ribbon.


As always you can find lots of adorable inspiration images here.

Thanks for visiting today!

Crafty Hugs ~ Pam xx

You can also follow me on Instagram or my facebook page!

Sweet Holiday Wishes

Hello and welcome!

I am back today with another cutie from Emma Punktchen Digital Stamps called Birdy. I’m SO in love with that pudgy little tummy!!

The website is filled with LOTS of adorable digital stamps for inspiration. The website is written in German, however Google will translate to English for you using the translation symbol to the far right of the Google search bar.


I printed this sweet image on X-press It Blending Card and colored it with the following markers.

~Copics~
Blue: B95, B93, B91, B000, B0000
Orange: YR18, Y15, Y38
Cheeks: R20, R00, R0000
Gray: W2, W1, W0, W00


Once all my pieces were die cut I got to work on ink blending. The background was ink blended with Distress Oxide Ink in Tumbled Glass. I added some watered down white Dr. Ph. Martin’s Bleed Proof White for the white splatters, and then added a few very tiny dots here and there with the my Copic marker B91. The trees were ink blended with Distress Oxide Ink in the color Bundled Sage.

Once everything was dry I added some sparkle with Stickles Glitter Glue – Stardust.

As always, you can find an abundance of super sweet inspiration images for sale here.

Thanks for visiting today!

Crafty Hugs ~ Pam xx

You can also follow me on Instagram or my facebook page!

Reach for the Stars

I have some exciting news to share! I have joined the Emma Punktchen Design Team!!

The website is filled with LOTS of adorable digital stamps for inspiration. The website is written in German, however Google will translate to English for you. I found the translation symbol to the far right of the Google search bar.

My first card as a design team member features this super sweet digital image called Sternchen.

I printed this sweet image on X-Press It Blending Card and colored it with the following Copic markers.

~Copics~
Gray: C2, 1, CO, COO
Pink: RV55, RV10, RV02, RV00, RV000, RV0000
Yellow: Y15, Y11, Y00, Y000, Y0000
Green: YG07, YG05, YG03, YG01, YG00, YG0000
Brown: E55, E31, E30, E50


The background was created with two coordinating pieces of patterned paper from my scrap bins. I added a die cut border with a thin piece of ribbon glued on top to cover up where the background paper is seamed.

The image was die cut with a square die from Gina K Designs and was attached with foam squares.

As always, you can find an abundance of gorgeous inspiration images for sale here.

Thanks for visiting today!

Crafty Hugs ~ Pam xx

You can also follow me on Instagram or my facebook page!

You make my heart smile

Hello and welcome!

I am back today after a little break away from crafting. I have been working on setting up some more crafty space to work in. Hoping it will be done soon.

Imagine how excited I was when Altenew asked if I would be interested in working on a collaborated post with them. I have always loved their beautiful products, so of course I said yes…how exciting!!!

For today’s project I focused on these gorgeous flowers from the Craft-A-Flower: Cistus Layering Die Set. The extra greenery is from the die set called Leaf Mix Die Set.

All the flower and leaf pieces were die cut from watercolor paper and then colored with Altenew Watercolor 36 Pan Set. Once these pieces were dry, I added some accents with gold craft paint.


I knew I wanted the flowers to be dimensional so I only glued them in the center portion. This would allow me to bend and curl the layers of petals.

I stamped the stripe background with the stamp set called Pinstripe Stamp Set. The eye catching shape I used for the sentiment base is from the Labels & Tags 2 Die Set. This piece was ink splattered with the same watercolor paints and gold craft paint that I used above.

The sentiment is from the Bold Bouquet Stamp Set. I also used the matching Bold Bouquet Die Set.

The black lacy border is from the Creative Edges: Scalloped Scallops Die Set.

I really love how this project turned out!!

Thank you so much for visiting today!

Crafty Hugs – Pam xx

You can also follow me on Instagram or my facebook page!