Bunny Hugs ~ La-La Land Crafts Tutorial

Happy Thursday everyone!

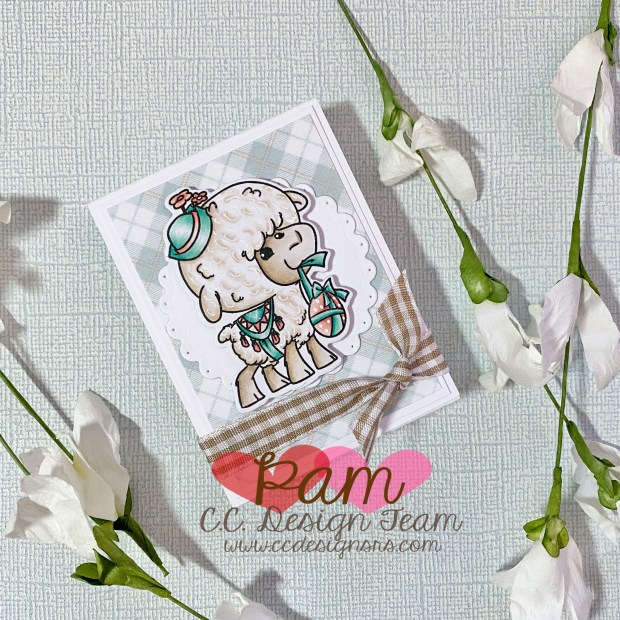
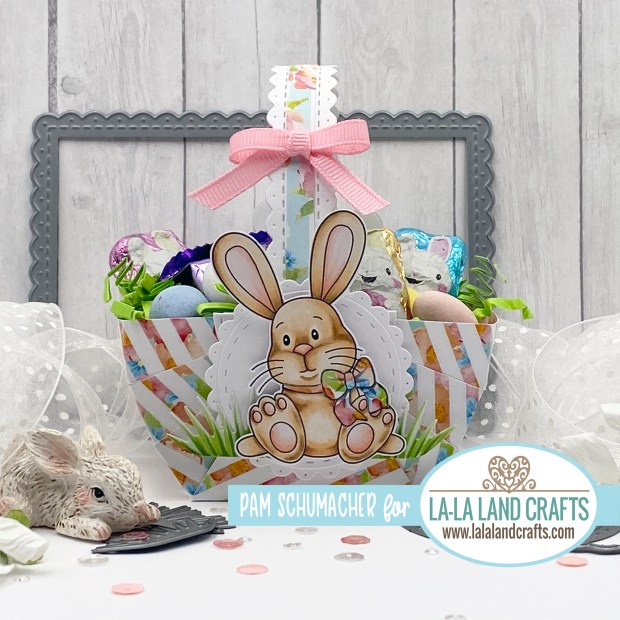
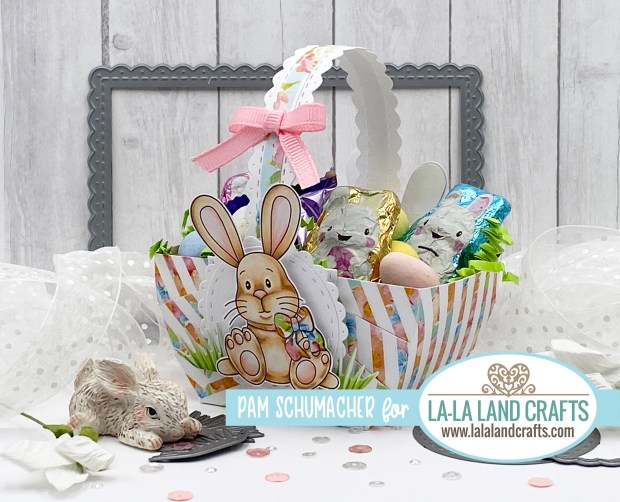
I’m so excited to share a cute tutorial for an adorable Easter basket featuring the super  sweet Bunny Hugs Rubber Stamp from La-La Land Crafts.  There are a few steps, but once you get the hang of how to put it together it goes pretty quick.

Bunny Hugs Tutorial

To make this little basket you will need:

Bunny Hugs Rubber Stamp
Love You More Paper Pad
Pierced Scalloped Circles Die
Double Stitched Circles Die
Grass Patches Die
Scalloped Rectangles Die
Pink Ribbon for Bow
Scoring Board and Bone Folder
Double Sided Foam Tape
Scor-tape – 1/8″ and 1/4″
Exacto Knife, Ruler, and Pencil
Removeable Tape
Green Paper Easter Grass and Easter Candy

Preparing the basket pieces:

  1. Stamp two bunnies on X-Press It Blending Card.
  2. Die cut two of the largest and two of the medium size grass patches from the Grass Patches Die set out of X-Press It Blending Card.
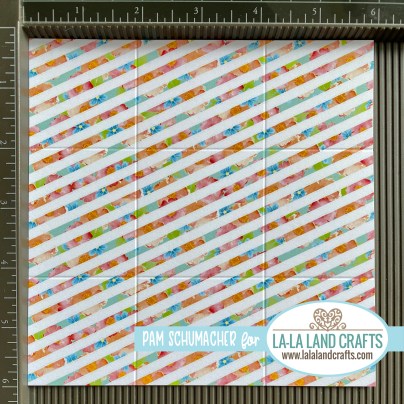
  3. Choose a piece of 6″ x 6″ double sided paper for the basket- mine is from the Love You More Paper Pad.
  4. Cut one piece 1/4″ x 6″ strip of coordinating double sided paper for the center of the basket handle.
  5. Cut one piece of white cardstock 3/4″ x 7″ for the handle.
  6. Cut two white scalloped circles (2nd to smallest) from the Pierced Scalloped Circles Die set.
  7. Cut four white double stitched white circles (2nd to smallest) from the Double Stitched Circles Die set.

Color your pieces and set aside.  Bunnies need to be fussy cut before final assembly.

~Copics~
Bunnies:  E55, E53, E51, E50, R02, R01, R00, R000
Grass:  YG17, YG03, YG11
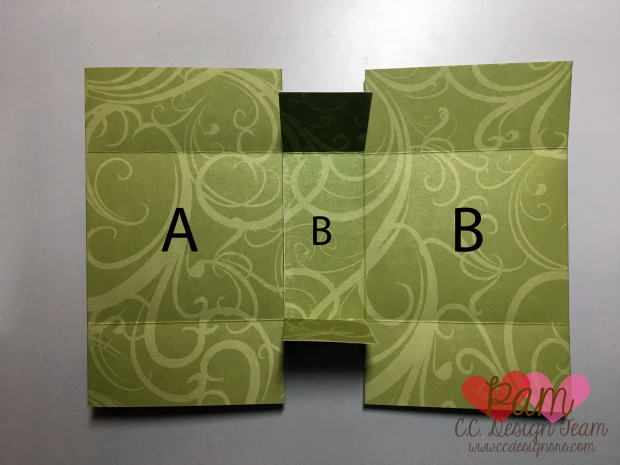
Basket

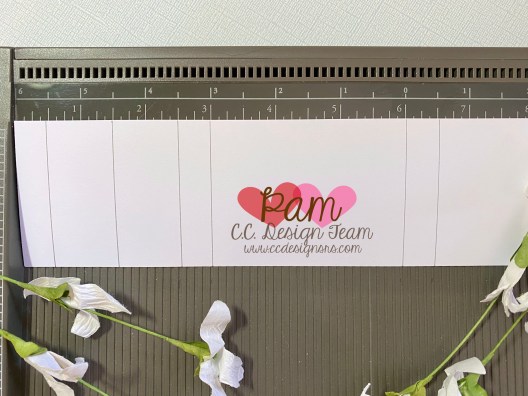
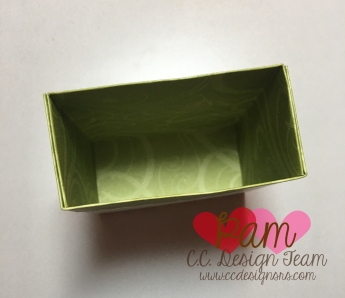
Using your score board, score at 1 7/8″ and 4 1/8″, turn your paper and score using the same measurements.  Your piece should look like this.

Bunny Hugs Tutorial1
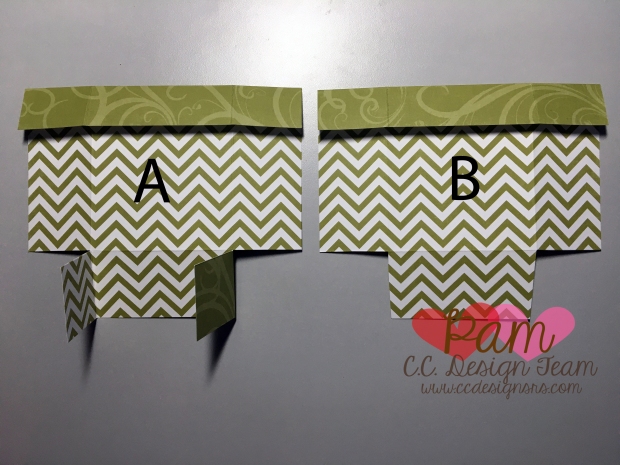
Using the following diagram I drew lines on my cardstock with a pencil and carefully cut on the lines.  The cutting lines are at 5/8″, 1 1/4″, 4 3/4″, and 5 3/8″.  You will need to mark the center line (3″) on the top and bottom.

Bunny Hugs Tutorial2

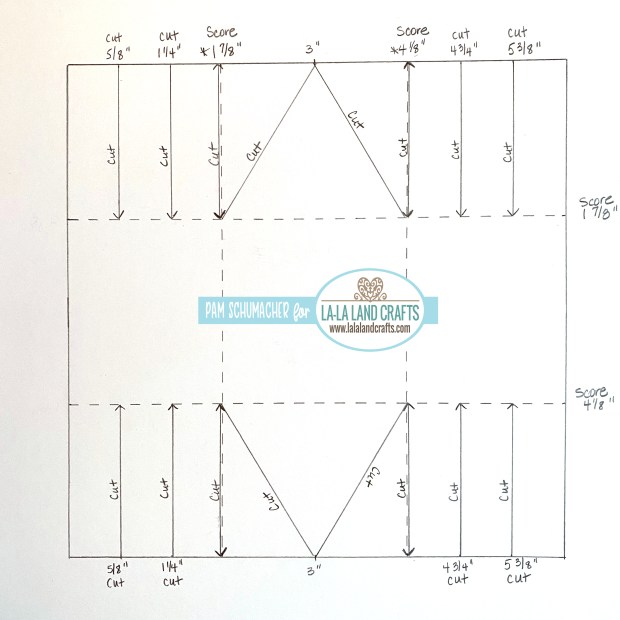
I found the lines were straighter cutting on drawn lines instead of scored lines.

Bunny Hugs Tutorial3
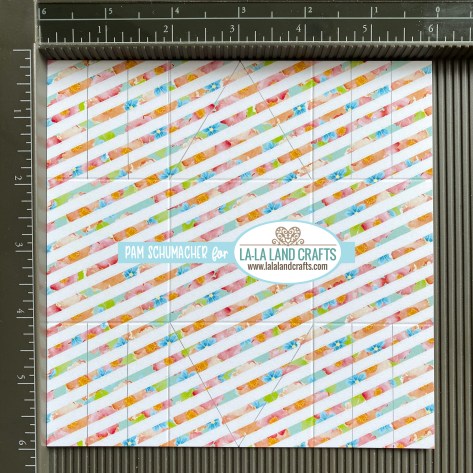
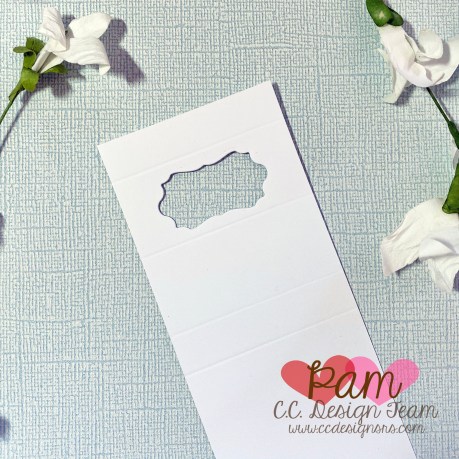
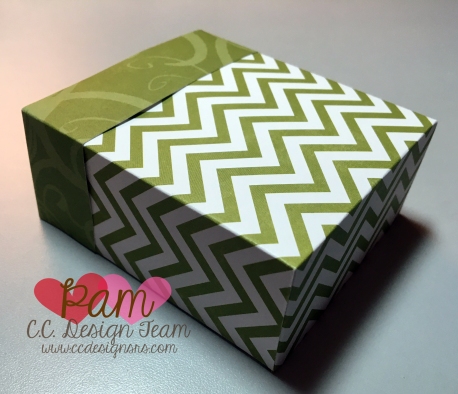
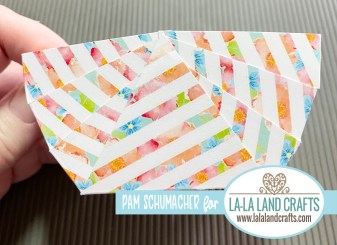
It should look like this once all the lines are cut.  I took a white eraser and gently erased any remaining pencil marks.

Bunny Hugs Tutorial4
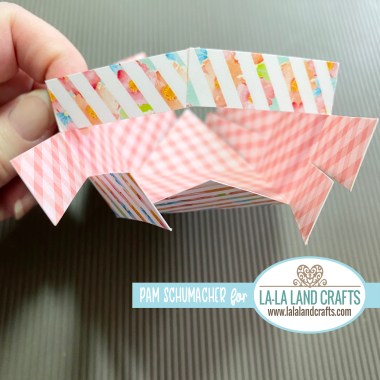
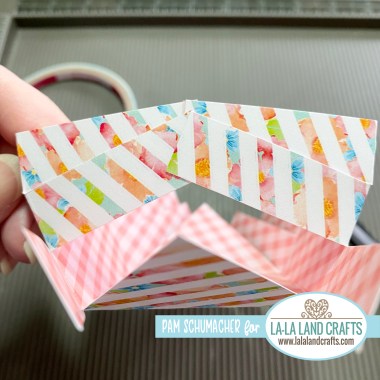
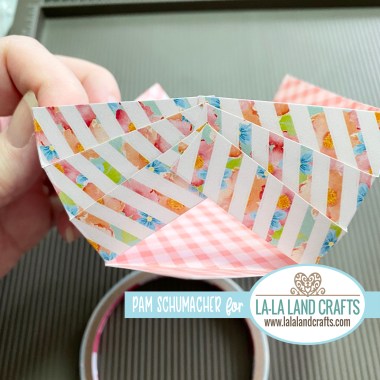
Fold and crease all of the fold lines, making sure the flaps are straight with the side edges.  Using 1/8″ scor-tape I started with adhering the basket sides together, starting with the top flaps.
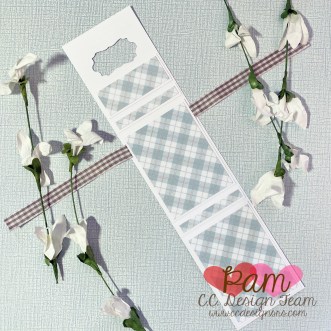
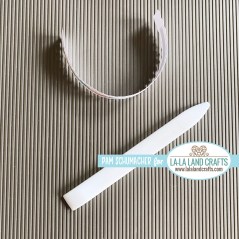
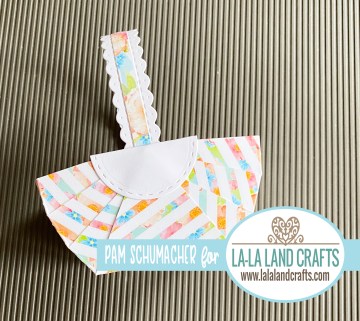
Bunny Hugs Tutorial5
Bunny Hugs Tutorial6

Bunny Hugs Tutorial7

Bunny Hugs Tutorial8
Creating the handle

With the 3/4″ x 7″ piece of white cardstock and the largest die from the Scalloped Rectangles Die, die cut using the following diagrams.  Note that you will need to stop and reverse your diecutting before you reach the end of the die.  You will then need to move your die down, turn it around so the top of the die is now the bottom and partially die cut again.  I placed my paper up against the edge of my paper cutter and taped the die to the paper using removeable tape.

Bunny Hugs Tutorial9
Bunny Hugs Tutorial10
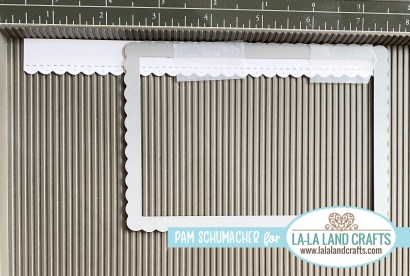
Make sure the die is fully seated in place from the first time through.  This will ensure the die will turn out as if the die was longer.

Bunny Hugs Tutorial11
Once this is complete, adhere the 1/4″ x 6″ coordinating print centering it between the stitched lines.  Note that this will be 1″ shorter than the white piece.  Gently curl the handle with your bone folder before attaching to the basket.

Bunny Hugs Tutorial12

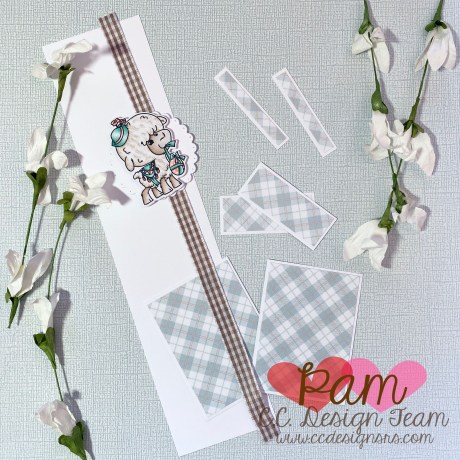
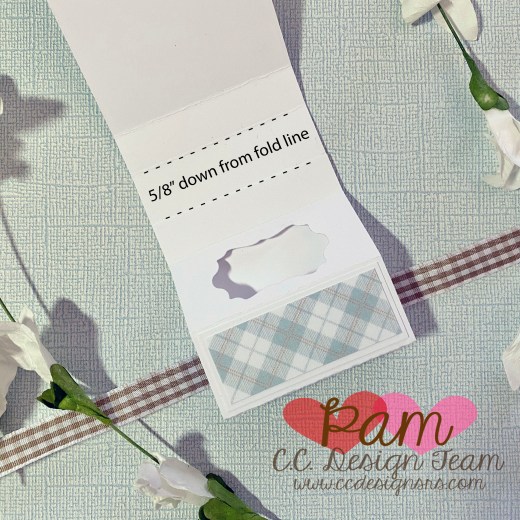
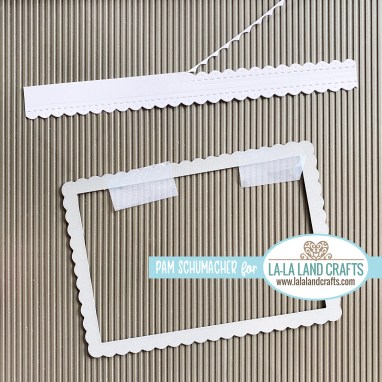
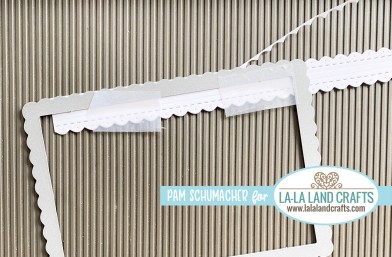
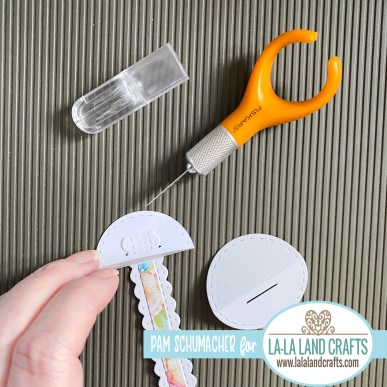
Preparing and attaching the handles to your basket.

Using two of the stitched circle die cuts, score and fold these in half.  I took a ruler and drew a line in pencil where I wanted to cut an opening that the handles could be inserted into.  I then took an Exacto type knife and cut an opening approximately 5/8′ long.  This side will be on the inside of your basket.  I inserted the handle from the top (the fold is the top) making sure that the outside of the handle faced the outside of the basket as shown.  This was attached using 1/4″ scor-tape.

Bunny Hugs Tutorial13

Attach the handle to the basket as shown.  I used liquid adhesive so that I had a little longer to get placement correct.

Bunny Hugs Tutorial14

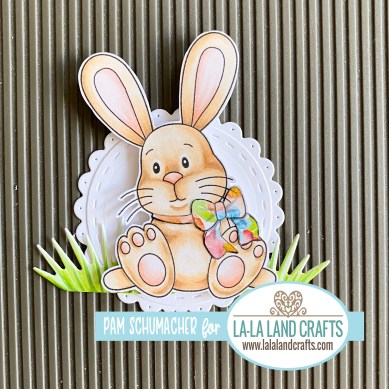
Assemble the outer embellishment as shown, you will have two – one for both sides of the basket.  I used double sided foam tape to adhere the bunny  to the circle and then to adhere the completed piece to both sides of the basket.

Bunny Hugs Tutorial15

Attach a tied bow to the handle, fill with paper Easter grass and candy.

Bunny Hugs Tutorial16

I hope you enjoyed my tutorial today!

As always, there is an abundance of inspiration to be found in the store here.

Thank you so very much for stopping by!

Crafty Hugs – Pam xx

You can also follow me on Instagram or my facebook page!


Tiny Easter ~ Treat Holder Tutorial

Hello everyone!

It’s time for another tutorial for C.C. Designs,  and I’ve got a cute little treat holder to share with you all.  For this project I used the super adorable Llama from the Tiny Easter Clear Stamp Set.  This little guy is so stinkin’ cute!!

Llama Treat Holder Photo 1

Supplies Needed to construct the treat holder:

C.C. Designs Tiny Easter Clear Stamp Set
C.C. Designs Tiny Easter Outline Metal Dies

White Card Stock:
(1) cut to 2 ¼” x 9 ½” – scored at ½”, 1 ½”, 2 ½”, 3”, 6”, and 6 ½”
(2) cut to 2 1/8” x 2 7/8”
(2) cut to 2 1/8” x 3/8”
(2) cut to 2 1/8” x 7/8”

From C.C. Designs Easter Paper Pack:
(2) cut to 2 ¾” x 2”
(2) cut to 2” x ¾”
(2) cut to 2” x ¼”

10” of double sided ribbon
Strong double sided tape – I use Scor-tape
Double sided foam tape
Bone folder
Scoring platform
Scalloped Circle Dies
Small die of your choice – used to make hole for the candy treat
Ghirardelli Milk Chocolate Caramel Bunnies

  • Score the White Cardstock (2 ¼” x 9 ½”) as shown (Do not fold yet)
    at 1/2″, 1-1/2″, 2-1/2″, 3″, 6″, and 6-1/2″

Llama Treat Holder Photo 2

Before you fold your piece on the score lines you will need to cut out the opening for the candy to sit in.  Die cut from the right (front) side of your paper.

Llama Treat Holder Photo 3

Flip the paper over and place Scor-tape to the top ½” (above the treat opening).

Adhere the plaid paper to all the white pieces with adhesive of choice, and attach the Llama to the white circle with double sided foam tape.

Llama Treat Holder Photo 4

Adhere the layered pieces to the large white base as shown.  The ribbon will need to be adhered before the layered piece can be attached in that section.

Llama Treat Holder Photo 5    Llama Treat Holder Photo 6

Fold and crease all the score lines, the top score line will fold to the front and all the rest will fold to the back.

Remove the backing to the tape from the back and attach it 5/8” down from the fold line.  Adhere the last remaining layered piece on top of it.

Llama Treat Holder Photo 7

Insert the candy (Ghirardelli Milk Chocolate Caramel Bunnies), close and tie bow.  Make sure you tie it loose enough that the cover can slide in and out.

Llama Treat Holder Photo 8

To decorate I colored the adorable little Llama from the Tiny Easter Stamp Set and cut her out with the coordinating cut it out dies.

~Copics~
Llama:  E43/42/41/40
Aquas:  BG13/11/10
Pinks:  R32/30/00
Yellow:  Y13

I cut out a scalloped circle of white, cut out the Llama with the Tiny Easter Outline Metal Die.  I then attached the Llama to the scalloped circle with double sided foam tape.  This was attached to the front of the treat holder with Scor-tape.

I hope you enjoyed my tutorial today!

Crafty Hugs,

am


Big Bear Hugs ~ Gift Bag Tutorial

Hello everyone!

It’s my turn to give a tutorial for C.C. Designs,  and I’ve got a cute little gift bag to share with you all.  For this project I used the super adorable bear from the Tiny Winter clear stamp set from C.C. Designs.  So much cuteness!

Big Bear Hugs

Supplies Needed to construct the bag:

(2) 6×6 pieces of double sided paper
White Ribbon
Strong double sided tape
Bone folder
Crop-A-dile or paper punch of your choice to punch holes for ribbon
Scoring platform
Self-adhesive rhinestones

  • Before you score your paper make sure you remember or mark what is the top so that your pattern is all going the same direction. One piece is for the front (A) and one for the back (B).
  • With outside paper facing up, score three sides at 1 ½”
  • Turn paper over and score the remaining side at 1”
  • Crease all of your score lines remembering to fold the top 1” score line toward the front of the bag. (As shown below)
  • On sheet marked ‘A’ cut in from both side on the score line in 1 1/2” to the score line.
  • On sheet marked ‘B’ cut out the two bottom squares. I cut at a slight angle on the center piece to reduce a little bulk when assembling.

Big Bear Hugs1

Add ScorTape or your favorite strong two sided tape as shown below.

Big Bear Hugs2

  • Remove the backing from the tape on the bottom flap of side marked B.
  • Turn both sides so the “inside print” is facing you, and adhere the center flap from side B on top of the center part of side A (as shown below)

Big Bear Hugs3

  • Remove the backing from the tape from both small side flaps on piece marked A and adhere to the inside of the sides of piece A as shown below.

Big Bear Hugs4           Big Bear Hugs5

  • Remove the backing from the tape on the remaining flaps of piece B and adhere them to the INSIDE of the sides of piece A. By tucking them inside you will not see any raw edges from the front of your box which will be the side marked A.  The small side flaps from piece A will become hidden if you assemble this way.

Big Bear Hugs7

  • Punch a hole in the center of each side of your bag.
  • Run ribbon through each hole from the outside, tying it on the inside.
  • I used 1/8 inch ScorTape to adhere a piece of white ribbon to the green flap, making sure the join was on the back side of the bag.

To decorate I colored the adorable little bear from the Tiny Winter Stamp Set with Copic markers and cut him out with the coordinating cut it out dies.

~Copics~
Bear: E37/35/34/53/30
Ears: E32/30/00
Nose: W8/6/4/100
Greens: YG17/03/01
Blues: B16/14/12/BV25

Big Bear Hugs8

To finish my bag I cut out a circle of vellum, and the snowflake circle out of white and attached the two together with liquid glue.  I adhered this to the bag with double sided foam tape.  I attached the bear to the front of this with double sided foam tape.  A sentiment and a little bling finished this cute little bag.

I hope you enjoyed my tutorial today!

Crafty Hugs,
Pam