Batty to the Bone

Hi friends!

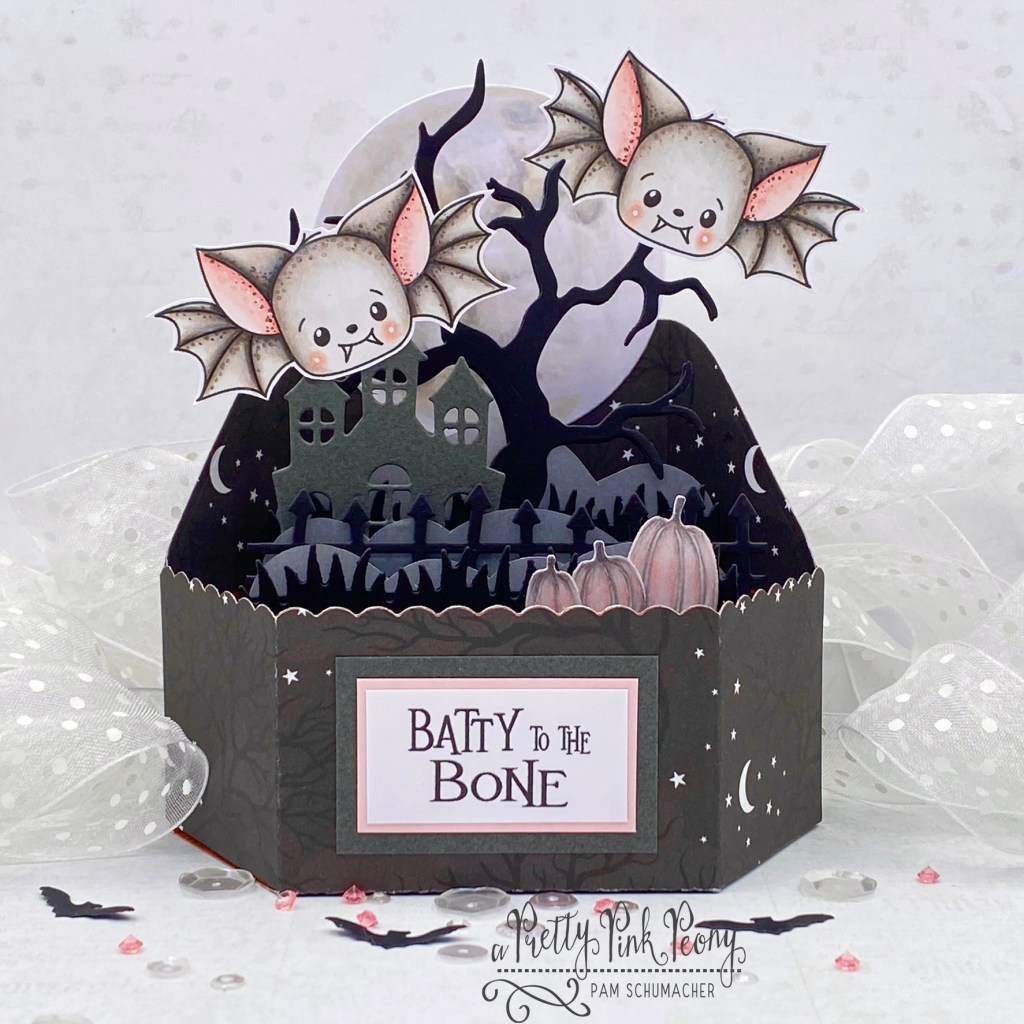
Aren’t these bats just the cutest little things?

These sweet bats are from the this month’s new release at Ink n’Splatter Stamps. These little cuties are from the Little Boy Boos Halloween Stamp Set. Coordinating dies are available here.

The sentiment that I used on my card is from the Sweet and Spooky Halloween Stamp Set, which also has coordinating dies available here.

These little cuties were stamped with Memento Tuxedo Black Ink on X-Press It Blending Card and and were colored with the following markers.

~Copics~
Bats: W6, W5, W4, W3, W2, W1, W0, R20, R30, R00, R000 – White Gel Pen
Pumpkins: W4, W2, W1, W0, R20, R00
Moon: W4, W3, W2, W0, W00, YR30, E40
Fine details were added with Prismacolor Pencils

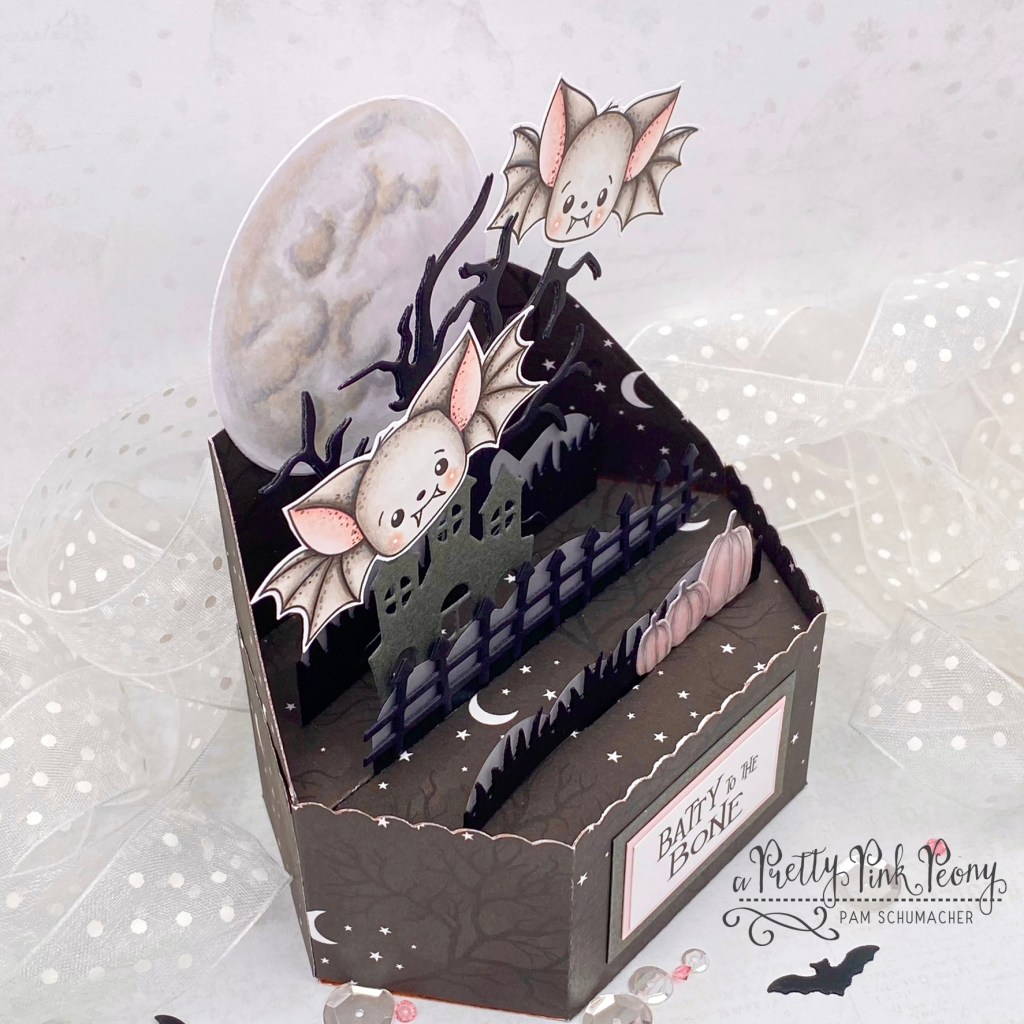
I had the coloring done and images cut out before I even knew what I was going to do with them. I had recently purchased the Lawn Fawn Platform Pop Up Die and the coordinating Platform Pop-Up Add-on and decided I would try a box card for a change.

The paper I chose had an orange print on the opposite side, so I had to come up with some creative thinking so that wouldn’t show…orange kind of clashes with pink…lol! Once I had that all figured out I dug through my dies to find things that would go together and that would fit inside the box.

With the box, grass, fence, and tree being all black I decided to cut out some cloud shapes to resemble a creepy ground fog.

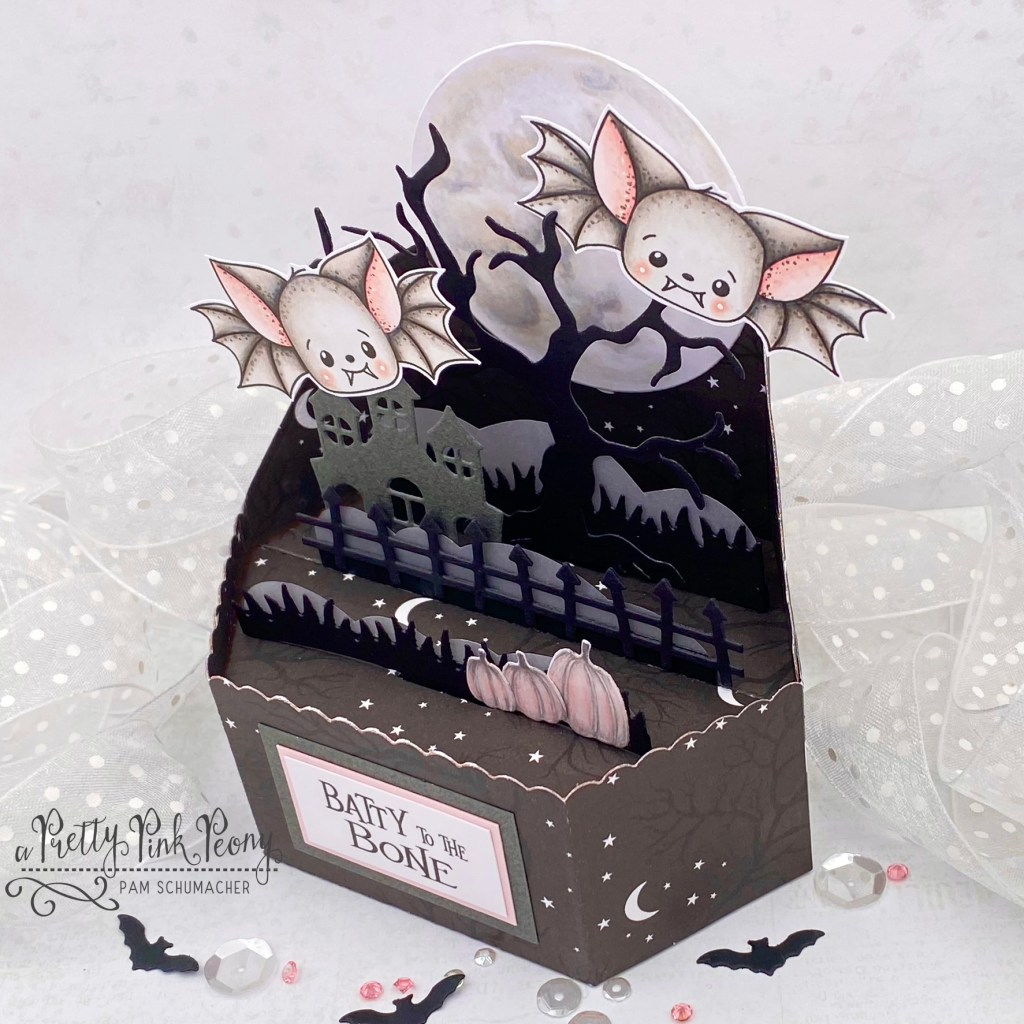
To create the moon, I die cut a circle with the X-Press It Blending Card and just started blending colors together until I thought it looked like a moon.

As always you can find an abundance of Ink n’Splatter products for sale here.

Thanks for visiting today!

Crafty Hugs ~ Pam xx

You can also follow me on Instagram or my facebook page!

Little house of Fairies

Hi friends!

If you follow my blog…you know I love all things girly and pink!

I have been wanting to create a little flip album for quite some time, and these adorable little fairies from Paper Nest Dolls were so perfect for this project.

My inspiration came from a project I saw online when ordering my paper.

Once I decided which elements I wanted to use from the Fairy Set, I printed them on X-Press It Blending Card and started coloring.

~Copics~
Skin: E13, E11, E21, E00, E000, E0000, R20, R30, R00
Hair Combinations: 100, E70, E59, E57, E55 / E29, E27, E25, E23, E99 / E55, E53, E51, E50
Teals: BG15, BG13, BG11, BG00
Yellows: YR23, Y15, Y11, Y00
Reds: R08, R05, R14
Oranges: YR18, YR16, YR15, Y18
Wings: BG0000, BG000, RV0000
Purples: V04, V01, V000, RV000
Pinks: RV55, RV02, RV00, RV0000
Grays: W7, W5, W3, W2, W1, W0
Greens: YG17, YG03, YG01, YG00

The mushroom shape was cut out with my Cameo Silhouette. I started with 5 white pages and added the layers to each side of the page. Embellishments were added with various dies I have. Lots of dies that haven’t seen love in a long time…lol!

I layered some of the flowers, adding enamel dots in various sizes to the centers of the flowers.

Every smart fairy knows they need a back door…cuz you never know when you need to sneak away…lol!!

As always, you can find an abundance of gorgeous inspiration here.

Thank you so much for visiting with me today!

Crafty Hugs ~ Pam

You can also follow me on Instagram or my facebook page!

Miss You

Hello crafty friends!

I don’t know about you, but I really miss my family and friends!

My project today features some beautiful dies from Crafty Meraki’s new release. The fabulous flower die is called Kelsey Meraki Flora Para-Dies. I paired the flowers with the Timeless Frames Mini Slimline Die and a sentiment from the To-tail-ly Awesome Stamp Set.

My card base is slightly bigger than the largest die from the Timeless Frames Mini Slimline Die to accomodate the layered look.

The flowers were die-cut from Watercolour paper and were colored with the following watercolour pencils.

~Derwent Watercolour Pencils~
Gunmetal 69
Olive Green 51
Grass Green 47
May Green 48
Golden Brown 59
Naples Yellow 7
Rose Madder Lake 21

Once my flowers were dry I added a small piece of cardstock behind the center of the flowers so the cutout portion could be glued down. I then punched an 1/8″ hole in the center of each flower so I could glue the stamens in place.

I curled some of the edges of the flowers before attaching them to my card with double sided foam tape. I then stamped the sentiment from the To-tail-ly Awesome Stamp Set, matted it with matching green card stock and attached that to my card with foam tape. The sequins were attached with Ranger Ink Glossy Accents.

As always, you can find an abundance of products for inspiration for sale here.

Thanks for visiting today!

Crafty Hugs ~ Pam xx

You can also follow me on Instagram or my facebook page!

3D Trinket Box ~ La-La Land Crafts

Good morning!

It’s Inspiration Friday at La-La Land Crafts with a theme of ‘3D’.

I have never made a circle box before, so before I could start I needed to do a little research on how to do it.  Once I decided on which style I had supplies for, I dove in.  I was nervous to be honest…lol!

I think settling on an image sometimes is the hardest part for me…in the end this adorable little garden fairy from the Love to Garden Clear Stamp Set won!  I have always been drawn to the sweetness of this set.

3D box

I started my project by stamping this little cutie on X-Press It Blending Card and colored her with the following Copic Markers.

~Copics~
Skin:  E13, E11, E21, E00, E000, E0000, R20, R30, R00
Hair:  E55, E31, YR21, E30, E50
Dress:  RV11, RV21, R000, R0000, BG72, White Gel Pen
Wings:  BG11, BG10, R0000
Shoes:  BG72, BG70, BG0000

3D box1

I used the Pointy Flowers Die and Foamiran Foam to create the curled flowers that have stamen centers.  I ran the dies through my die cutting machine using the foam instead of paper, colored them with Distress Oxide inks and then heated them with an iron (with the inside of flower facing the iron) for a few seconds until they started to curl.

La-La Land Crafts Products used on my card:
Love to Garden Clear Stamp Set
Spring Has Sprung Paper Pad
Pointy Flowers Die
Spring Blossoms Small Die
Rolled Rose Large Die
Rolled Rose Small & Medium Die
Shabby Flourishes Die
Long Flags Die
Small Scallops Border Die
Stitched Nested Circles Die
Pierced Scalloped Circles Die
Flower Elements Border Die

lllc round box2

As always, there is an abundance of inspiration to be found in the store here.

Thank you so very much for stopping by!

Crafty Hugs – Pam xx

You can also follow me on Instagram or my facebook page!

**I participate in La-La Land Crafts affiliate program.  That means I receive a small commission when products are purchased through the links on my blog at no extra cost to you.
Thank you so much for your support!