
Hello everyone!
It’s my turn to give a tutorial for C.C. Designs, and I’ve got a cute little gift bag to share with you all. For this project I used the super adorable bear from the Tiny Winter clear stamp set from C.C. Designs. So much cuteness!

Supplies Needed to construct the bag:
(2) 6×6 pieces of double sided paper
White Ribbon
Strong double sided tape
Bone folder
Crop-A-dile or paper punch of your choice to punch holes for ribbon
Scoring platform
Self-adhesive rhinestones
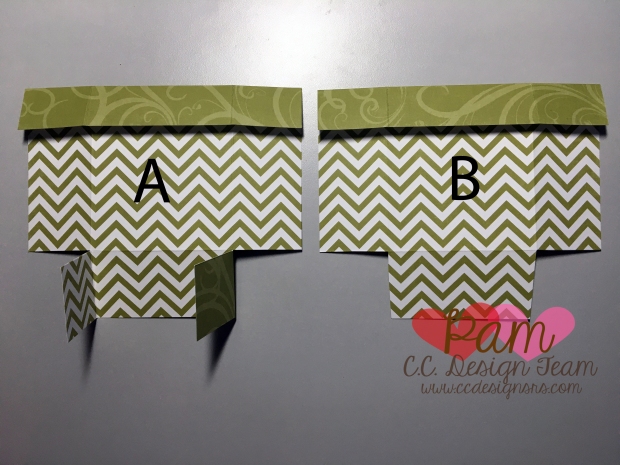
- Before you score your paper make sure you remember or mark what is the top so that your pattern is all going the same direction. One piece is for the front (A) and one for the back (B).
- With outside paper facing up, score three sides at 1 ½”
- Turn paper over and score the remaining side at 1”
- Crease all of your score lines remembering to fold the top 1” score line toward the front of the bag. (As shown below)
- On sheet marked ‘A’ cut in from both side on the score line in 1 1/2” to the score line.
- On sheet marked ‘B’ cut out the two bottom squares. I cut at a slight angle on the center piece to reduce a little bulk when assembling.
Add ScorTape or your favorite strong two sided tape as shown below.

- Remove the backing from the tape on the bottom flap of side marked B.
- Turn both sides so the “inside print” is facing you, and adhere the center flap from side B on top of the center part of side A (as shown below)
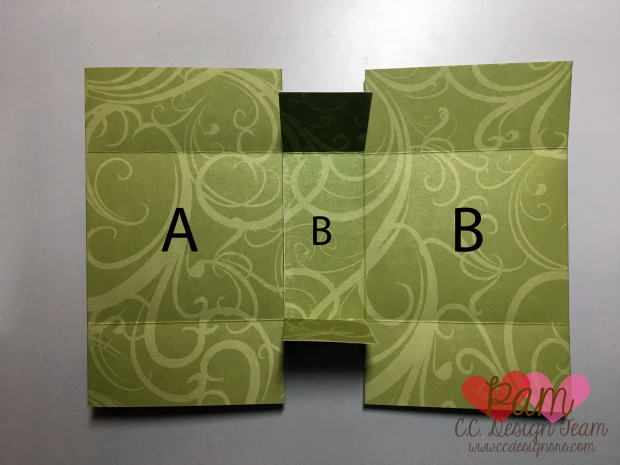
- Remove the backing from the tape from both small side flaps on piece marked A and adhere to the inside of the sides of piece A as shown below.

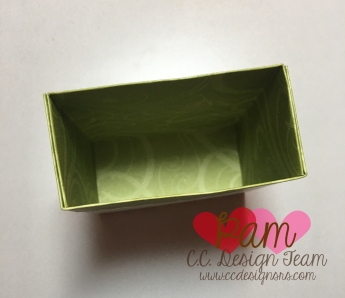
- Remove the backing from the tape on the remaining flaps of piece B and adhere them to the INSIDE of the sides of piece A. By tucking them inside you will not see any raw edges from the front of your box which will be the side marked A. The small side flaps from piece A will become hidden if you assemble this way.
- Punch a hole in the center of each side of your bag.
- Run ribbon through each hole from the outside, tying it on the inside.
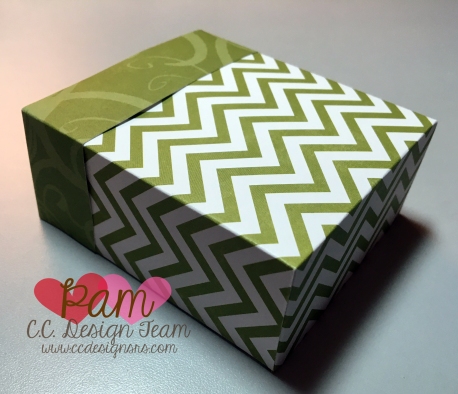
- I used 1/8 inch ScorTape to adhere a piece of white ribbon to the green flap, making sure the join was on the back side of the bag.
To decorate I colored the adorable little bear from the Tiny Winter Stamp Set with Copic markers and cut him out with the coordinating cut it out dies.
~Copics~
Bear: E37/35/34/53/30
Ears: E32/30/00
Nose: W8/6/4/100
Greens: YG17/03/01
Blues: B16/14/12/BV25
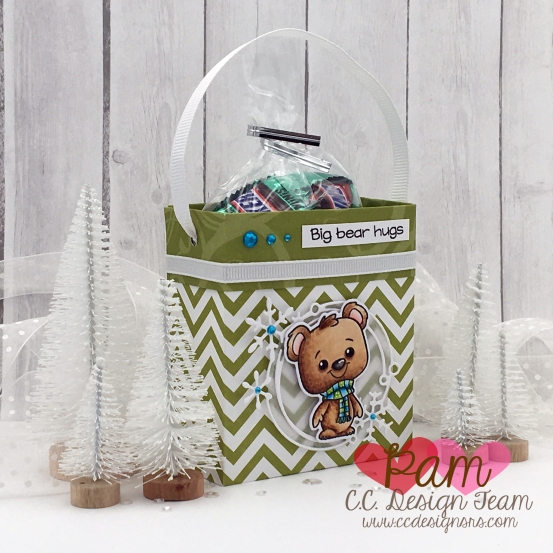
To finish my bag I cut out a circle of vellum, and the snowflake circle out of white and attached the two together with liquid glue. I adhered this to the bag with double sided foam tape. I attached the bear to the front of this with double sided foam tape. A sentiment and a little bling finished this cute little bag.
I hope you enjoyed my tutorial today!
Crafty Hugs,
Pam

Avery informative Tutorial, your bag is gorgeous the image is soooo cute. Crafty Hugs Marlene
LikeLike
Thank you Marlene!
LikeLike